In this workshop, we will walk through how to build a Fibonacci graph generator!

The Fibonacci sequence is a peculiar series of numbers from classical mathematics that has found applications in advanced mathematics, nature, statistics, and computer science.
The Fibonacci sequence is a series of numbers where a number is the addition of the last two numbers, starting with 0, and 1. 0, 1, 1, 2, 3, 5, 8, 13, 21, 34, 55… and so on.

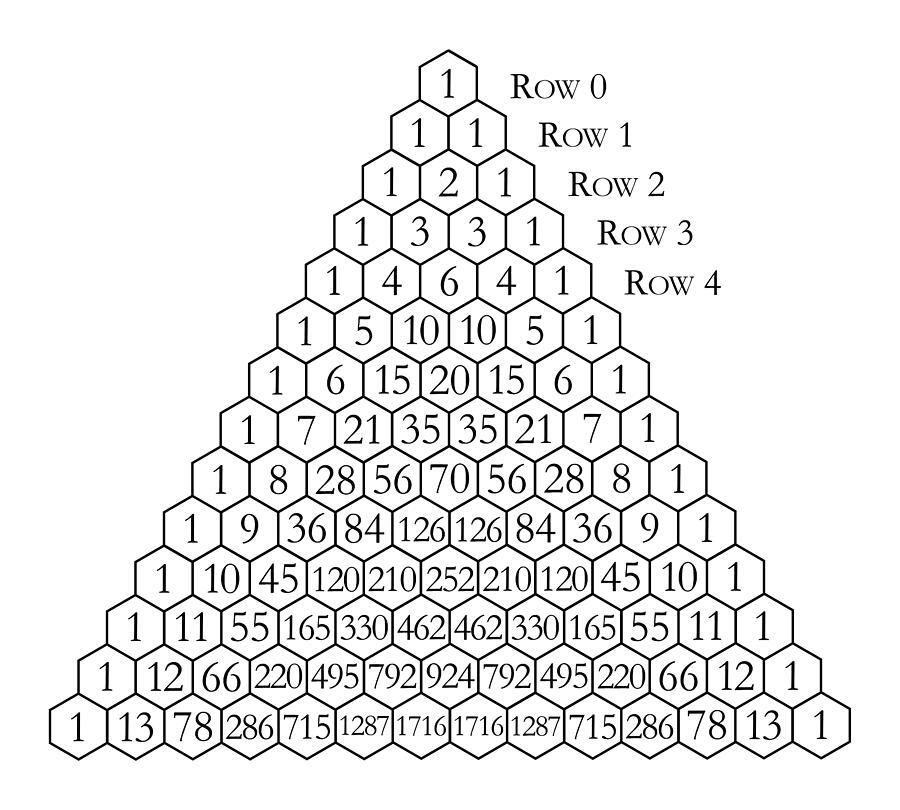
You may have seen Pascal's Triangle in math class. The diagonals in Pascal's triangle add up to the Fibonacci sequence.
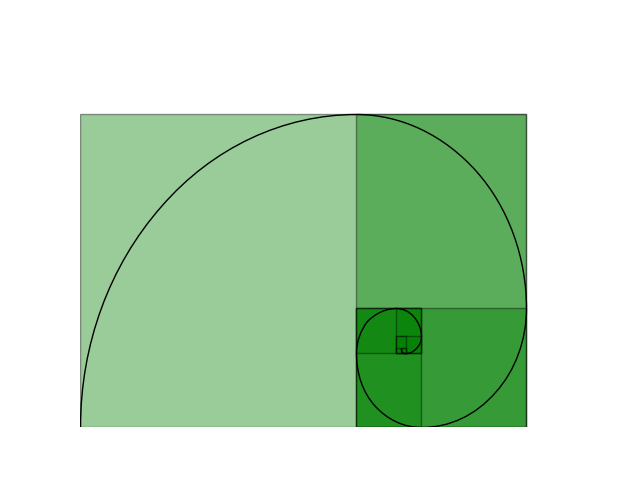
You may also notice that the "Fibonacci graph" picture at the beginning of this workshop looks similar to the Golden ratio. The Golden ratio is derived from the Fibonacci sequence.
Sound interesting? Let's build it with Python!
Getting started

We're going to be using Repl.it, a free, online code editor, to code our project. To get started, visit repl.it/languages/python3. Your coding environment will spin up instantly!
Importing Modules
Let's start by importing the libraries we'll need for this workshop. At the top of the main.py file, add:
import turtle
import math
turtle is a library for Python that allows you to easily draw things. We'll be using it to draw our Fibonacci graph.
math is a library that will make some of our mathematical calculations easier.
Setting up a display screen
Now, let's set up a Turtle screen. Under the import statements you just wrote, add:
wn = turtle.Screen()
wn.setup(1000,800)
wn.bgcolor("white")
turtle.Screen() sets up a screen for us. setup() sets up the size of the screen (in our case, 1000 by 800). bgcolor() sets the background color of our screen (we're setting it to white).
Generating a series of rectangles
Now that we've set up the window, we're ready to start drawing. Let's start by moving around the screen and generating a series of rectangles. Under all the code you just wrote, add:
myTur = turtle.Turtle()
myTur.pensize(5)
myTur.color("Blue")
myTur.shape("turtle")
turtle.Turtle()initializes a new Turtle.pensize()sets the size of the "pen" that we'll draw with. We're setting it to 5.color()sets the color of the pen. We're setting it to blue.shape()sets the shape of our turtle. We're setting it to a "turtle", so a turtle-shaped thing will walk around the screen drawing everything!
Now, let's write the code that will calculate the value of the Fibonacci series and move the turtle accordingly. Under all the code, add a function called main(), like so:
def main():
    valueOne = 0
    valueTwo = 1
    fib = 1
    myTur.fillcolor("black")
    myTur.begin_fill()
    for i in range(8):
        myTur.right(90)
        drawSq(fib*20)
        fib = valueOne + valueTwo
        valueOne = valueTwo
        valueTwo = fib
- First, we define the function.
- Then, we initialize three variables:
valueOne,valueTwo, andfib. - We set the
fillcolortoblack. - Every turtle movement after
begin_fill()will draw on the screen. - We loop 8 times:
- Turning right 90 degrees
- Drawing a square (we haven't defined the
drawSq()function yet, but we will in a moment), passing in the length of the rectangles we want to generate. - Resetting the value of
fibto the sum ofvalueOneandvalueTwo - Setting
valueOneequal tovalueTwo - Setting
valueTwoequal tofib - When we do this 8 times, we draw 8 rectangles, and we'll start to see the Fibonacci sequence generate.
Note: We've multiplied the fib with 20 so that we'll get a magnified graph.
Now let's write the drawSq() function that we reference above:
def drawSq(sides):
    for n in range(6):
        myTur.forward(sides)
        myTur.left(90)
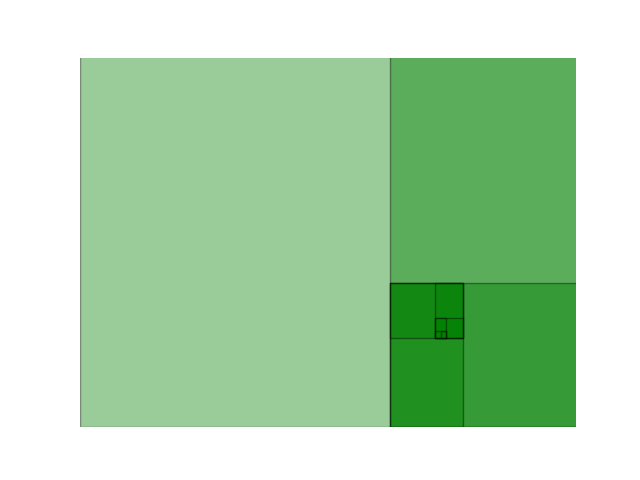
If you run the above code by clicking the green "Run" button at the top, you'll see a figure which displays series of rectangles, one embedded inside the other.
Yay! You've completed the first section of this project!

Now, let's write some functions for creating the Golden Spiral.
Generating Golden Spiral
Now that we've written the code to generate the rectangles, we can place the golden spiral on the rectangles!
The easiest way to do this is to create a second turtle for drawing the spiral. Under the previous turtle setup code, but above all of the funcitons, add:
spiralTurtle = turtle.Turtle()
spiralTurtle.pensize(3)
spiralTurtle.color("red")
Next, at the bottom of the file, add a function called spiral()
def spiral():
    r = 20
    angle = 90
    spiralTurtle.right(90)
    spiralTurtle.penup()
    spiralTurtle.setpos(0,0)
    spiralTurtle.pendown()
    # draw fibonacci spiral
    arc(20, angle)
    arc(20, angle)
    arc(40, angle)
    arc(60, angle)
    arc(100, angle)
    arc(160,angle)
    arc(260,angle)
    arc(420,angle)
Since we've magnified the graph by 20 in an earlier step, we set the radius for the curve to be generated within the first two rectangles to 20. Later, we'll keep increasing the size of the radius by a factor of 20 to maintain the uniformity of the curves. The starting position of the curve is set to (0, 0) which aligns it with the starting point of the first rectangle. Then, we just pass on the radius and the angle as arguments to the function called arc(), which we'll define in a moment.
If you're confused about how the value for the radius of the curve is been calculated, here's an explanation for that:
Explanation
We're simply multiplying 20 with the numbers that are present in the Fibonacci sequence:
For example:
- **No.s in Fibonacci Series * 20 = radius**
-     1  *  20 = 20
-     1  *  20 = 20
-     2  *  20 = 40
-     3  *  20 = 60
-     5  *  20 = 100  ....and so on.
Now, Let's declare and define the arc() function that we invoked in the previous code. This is the function that sets up the starting position for drawing the arc.
def arc(r, angle):
    arc_length = 2 * math.pi * r * abs(angle) / 360
    n = int(arc_length / 4) + 1
    step_length = arc_length / n
    step_angle = float(angle) / n
    # Before starting making a slight left turn.
    spiralTurtle.left(step_angle/2)
    arcLine(n, step_length, step_angle)
    spiralTurtle.right(step_angle/2)
- This function uses the radius and angle passed on as an argument to it.
- The arc_length variable calculates the length of the arc that is to be drawn inside each rectangle.
- The arc function also makes sure that the direction of the object (spiralTurtle) is to the left before a new arc is generated.
- The step_length variable determines the length by which the arc is to be incremented each time.
- Similarly, the step_angle increments the angle of the arc.
Now, we need to define the arcline function which is called in the above code. The arcline function makes sure that the curves or arcs are drawn perfectly. This is the function that is actually responsible for the creation of arcs.
def arcLine(n, length, angle):
  # Draws n line segments.
    for i in range(n):
        spiralTurtle.forward(length)
        spiralTurtle.left(angle)
And here is the golden curve it generates!

Invoking the functions
Almost done! Now, to make this entire project functional and generate the Fibonacci graph, we need to invoke all the functions we just wrote. At the very end of the file, add:
# main program loop
main()
myTur.end_fill()
spiral()
wn.exitonclick()
- First, we call the
main()function we wrote near the beginning of this workshop. - Then, we call
myTur.end_fill(), which stops filling the first turtle obejct. This will also fill the blue rectangles with a black color. - Then, we will call the
spiral()function we wrote earlier. - Finally, we call
wn.exitonclick(), which will terminate the program whenever the user clicks on the display screen.
Voila!

You did it! You just created history's most amazing graph generation application for mathematics, in only around 80 lines of code!
Hack It ;)
The fun doesn't stop here. Here are some ways you can take this project even further 🚀
- Instead of printing the whole graph, you can just print the number on the **n***th* place.
- It is also possible to the Fibonacci graph in a backward direction. Meaning that we start from infinity and then head over to one and finally zero. This is a bit hypothetical but it would be pretty cool to get answers from the generator like infinite + x/n.
Demos
- In this version, you can first specify the number of elements (nth value) and the output will generate the Golden Spiral until that value only.
- If you just wanted to generate the sequence instead of generating the Golden Spiral, you can refer to this version.
- Ever wanted to count the number of Prime numbers in the Fibonacci Sequence? Here's a demo which can fetch that for you!
Happy Hacking ♥

